File sharing is a useful feature in Windows that allows you to get access to files stored on another server’s hard drive. Also, you can allow access to files stored to your computer’s hard drives to another with enabling option for file sharing in Windows.
[leaderad]
You can turn your computer running Windows 8 into a server computer enabling file sharing and printer sharing. In effect, your computer will function as both a client and a server. Here are the easy steps to enable file sharing in Windows 8:
1) Go to Start Screen and select “Search” option available in the Charms option and type Control Panel and then press Enter.
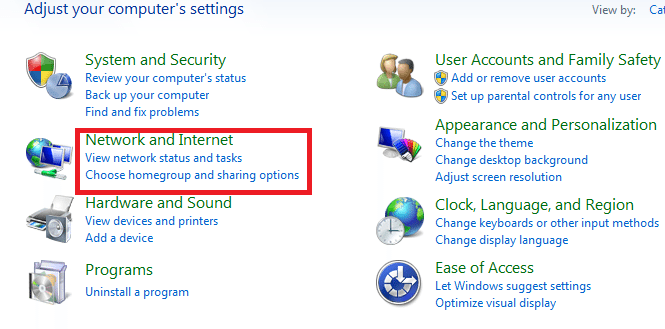
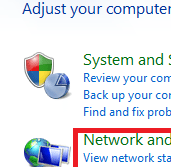
2) Go to “Network and Internet” Option. Now, select “Network and Sharing Center”. This window shows you setting of your network connections and networking sharing. Here, you will find options to change your network adapter settings, link to all network sharing settings, and wizards for new connections.
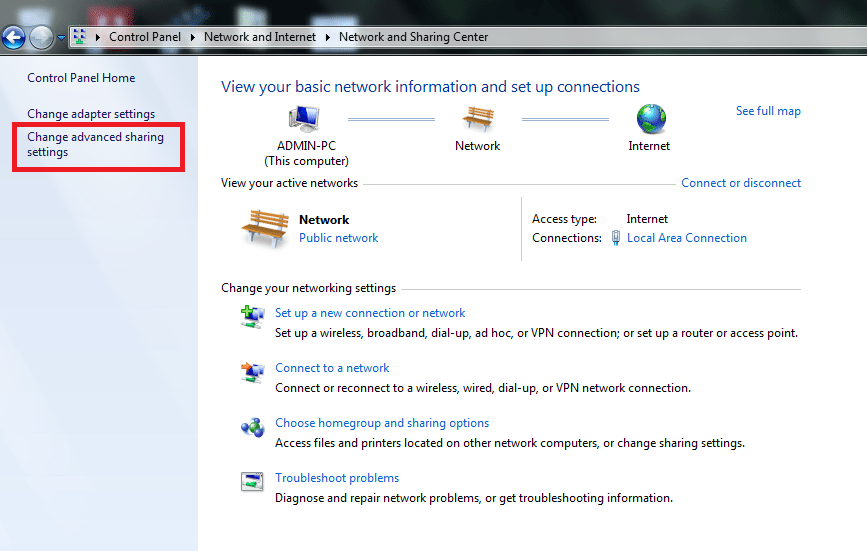
3) Tap on Change Advanced Sharing Settings on the left column.
4) Now, a list will appear of all the available networking sharing settings in Windows.
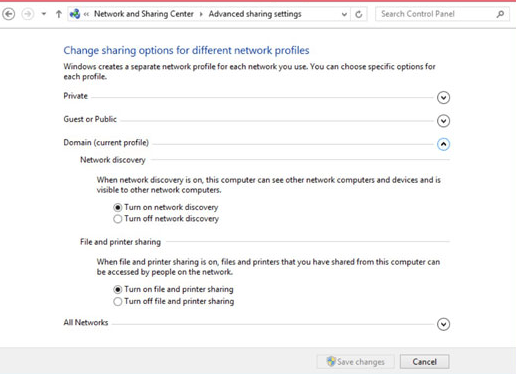
5) Click the down arrow next to the network you want to enable file sharing in Windows 8. For home computer, click the down arrow next to Home or Work or Private. For computer connected to a domain network, click the down arrow next to Domain.
6) Save Changes and Restart your computer to see the changes.
When you want to disable file sharing in Windows, you can follow the same steps and then choose the option to Turn off file and printer sharing and save the changes.
Have something to add to this story? Share your views with us in the comments section.