USB drives can be used for booting into Windows. When you don’t have Windows installation or it is damaged, you can use bootable USB pendrive for installing Windows into your computer system. This guide will help to make USB bootable in Windows 7, Vista and XP.
[leaderad]
Here are the steps:
Step 1:
Firstly, you need to insert a USB drive into your system. It is recommended to use USB of 4 GB or more and as USB needs to format to make bootable, you should have backup of all the data stored in your USB.

Step 2:
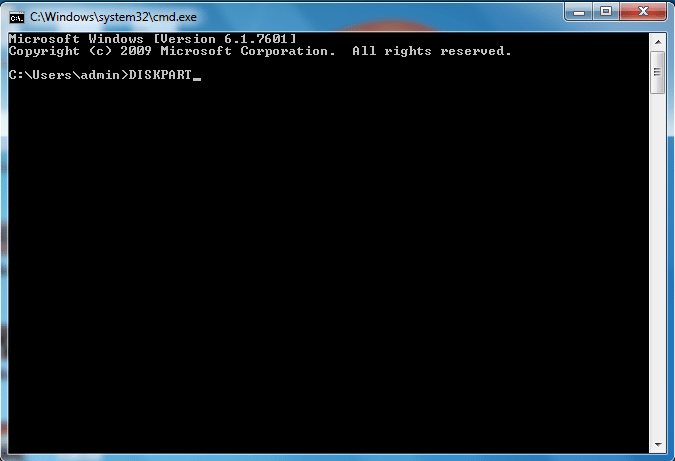
Now, type CMD in Start menu search field. Hit Enter. Alternatively, you can go to Start> Programs> Accessories> Right click Command Prompt> Run as Administrator.
Step 3:
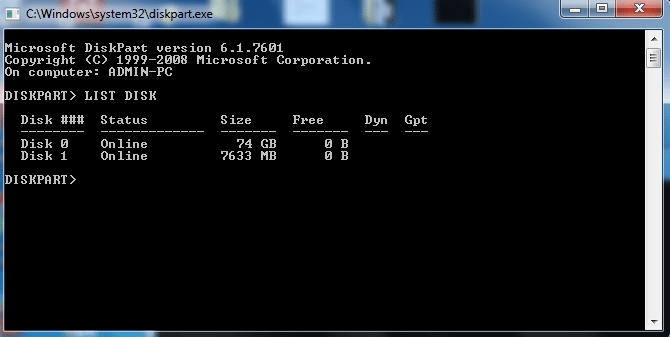
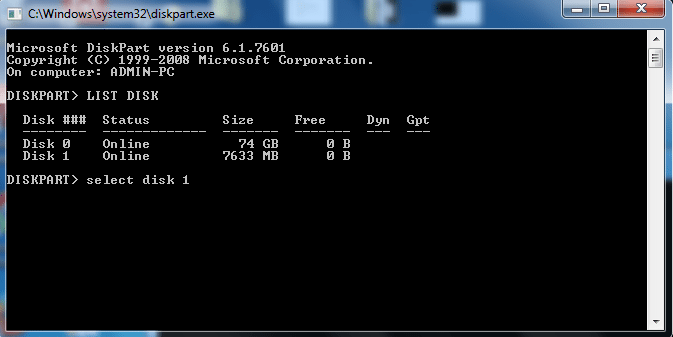
Now you need to type DISKPART and hit Enter. Type LIST DISK and hit enter.
This will show you a list of all the drives that are connected to your computer. When you have your USB drive inserted, it will also be listed here as well.
Step 4:
To select the USB drive, you need to enter the command Select disk and then type the number of your disk. For example, type select disk 1 when disk 1 is your USB drive.
Step 5:
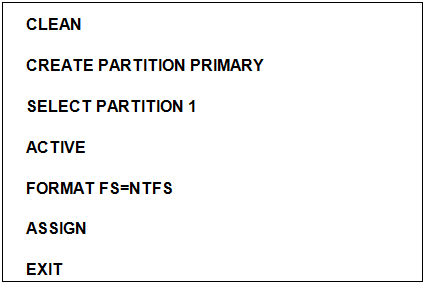
The next step is to enter the command clean and this command will erase all data from your USB.
Now, type create partition primary
Enter select partition 1 and press enter. Here, you will receive a confirmation message.
Type active and hit Enter. This command activates the partition.
Type FORMAT FS=NTFS and now, Enter. This program will work for a few minutes and you can see the percentage completed.
Step 6:
When you see 100% completed and successfully formatted the volume message, now enter the command assign to give drive a letter designation.
Step 7:
Type Exit
Step 8:
The next step to make USB bootable in Windows is to copy the installation files for operating system to the USB drive. Open the USB drive and copy the files and drivers that you need for operating system installation.
Step 9:
You’re done! You have successfully made USB bootable in Windows.
If you have something to add to this post, please share with us in the comments!