Today, we are discussing some of the useful ways to take screenshots in Windows 8 and up, without using any third-party tools and applications.
[leaderad]
Using Keyboard Shortcut
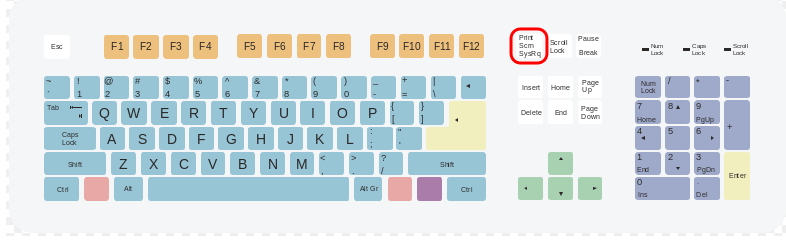
1) PrtScrn
This is the best known method of taking screenshots. On the keyboard, press the PrtScrn (Print Screen) key. In most keyboards, the button is usually found between F12 and Scroll Lock. Please note here that you will not get any confirmation that the screenshot has been taken.
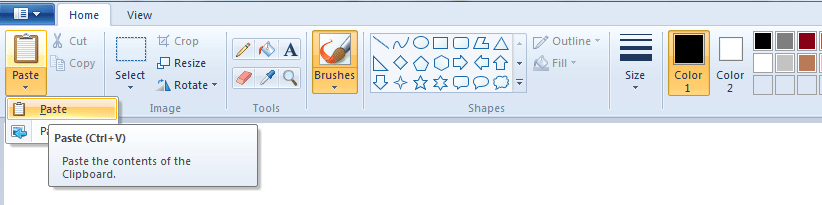
When the screenshot is taken, you need to paste it to the program. Paste it into a Paint file by pressing Ctrl + V. Click File and then “Save” to set the name and file type. You can save file types as JPG and PNG. You can also do some basic editing.
2) Alt & Print Screen
In Windows 8 and 8.1, press Alt + PrtScn to take screenshots of the active window. Just open the window which you want to capture and press Alt + PrtScn on the keyboard. The screenshot will be saved to the clipboard. Open Paint and page the image to edit and save it.
3) Windows logo + PrtScn
Windows + PrtScn offer you one of the simplest ways to take screenshots. In Windows 8 and 8.1, you do not need any other tools to save the screenshot as a file on the disc. By default, the screenshot is saved to C:\Users\Username\Pictures\Screenshots.
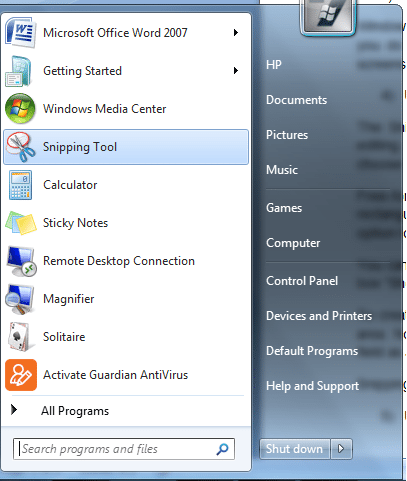
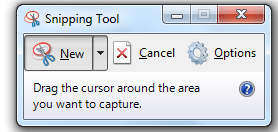
4) Use the Snipping Tool
The Snipping Tool is an excellent application for taking screenshots of all kinds and performing editing. To capture a screenshot, click the arrow next to New and choose the type of snip. You can choose from Free-form Snip, Rectangular Snip, Window Snip or Full-screen Snip.
Free-form Snip allows you to draw any shape while the Rectangular Snip lets you select a rectangular area which will be snipped. With Window Snip, you can choose a window to snip and the option to Full-screen Snip snips the whole screen.
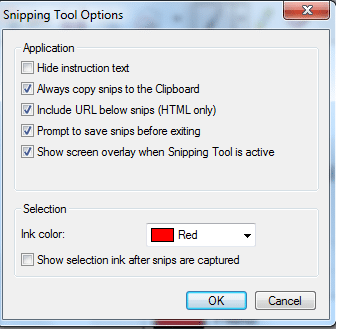
You can change or disable the snip border by clicking the Options button. In Options, uncheck the box “Show selection inks after snips are captured” to remove the by default red border around it.
To create a new snip, click the New button and the screen will fade to allow you to select the Snip area. Now, click the floppy disk icon to open the save dialog. You can change the “Save as type” field as JPG or JPEG, PNG or GIF.
Snipping tool offers you an excellent and efficient way to take screenshots in Windows.
5) Using Share Charm in Windows 8.1
In Windows 8.1, you can take and share screenshots using the Charms concept. Bring up the Charms bar and select Share charm. Then, a sidebar will appear and tap the application’s name under the Share text and select screenshot. The screenshot will be automatically taken. You can also share it via email or social networking apps.
If you know some other ways to take screenshots in Windows 8 and up, please feel free to share them in the comments.