When you are using Google Chrome, you can use your Gmail account to optimize it. Along with saving passwords, bookmarks and other information, you can also use Chrome to auto-fill details with a single click. Autofill is the feature that gives you suggestions as you type in a form field such as filling in shipping details or credit card information.
[leaderad]
How to enable autofill settings in Chrome
This function is a time-saving feature and saves you from filling up same data over again and again. It provides easy access to previously entered data and helps you to save your time and efforts.
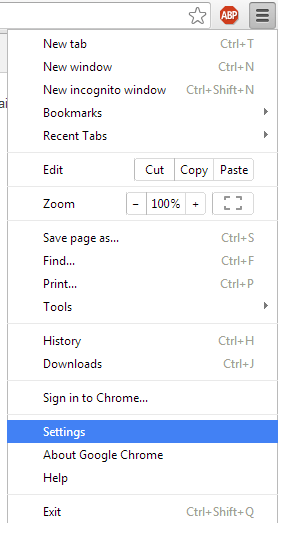
1) Open the Google Chrome Browser.
2) Click on the Menu in the upper right-hand corner of the screen. A three-line icon appear for going to the Settings. Click on settings.
3) Now, Click on Show Advanced Settings at the bottom of the Settings window.
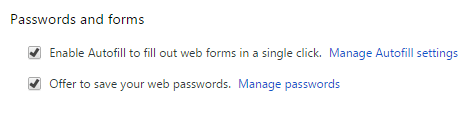
4) Look for “Passwords and forms” and in this, two tick boxes are there. One is to “Enable Autofill to fill out web forms in a single click” and the other one is to “Offer to save your web passwords.”
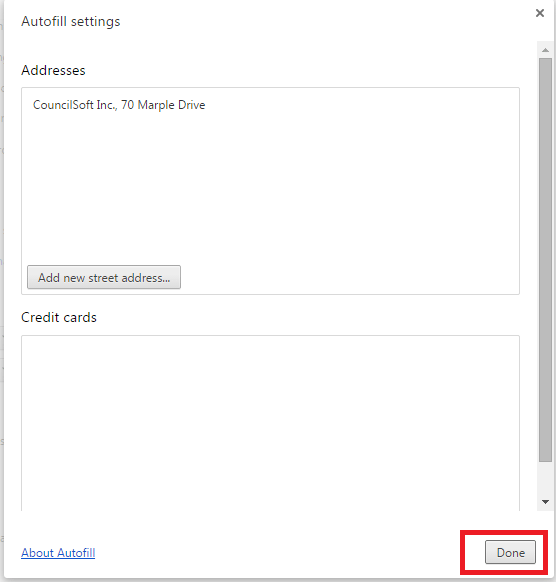
5) When you want autofill settings, make sure that the check box is ticked. You will see a bluelink saying “Manage Autofill settings.” Click on the link and a new window will pop up where you can type in street address and your credit card details.
6) The option to “Offer to save your web passwords” allows you to save passwords in Google Chrome. Once you check the box, you can click on link that says “Manage Passwords.” Then, a new window will appear and here, you can see which websites you have saved passwords and which are never saved. You can add or delete websites as per your choice.
How to disable autofill settings in Chrome
When you don’t want Chrome to save your personal information like your address or credit card number, you can remove saved autofill entries and disable autofill features.
1) Open the Google Chrome Browser.
2) Click on the Menu in the upper right-hand corner of the screen. A three-line icon appear for going to the Settings. Click on settings.
3) Look for “Passwords and forms” and in this, two tick boxes are there. One is to “Enable Autofill to fill out web forms in a single click” and the other one is to “Offer to save your web passwords.”
4) Deselect the checkbox next to “Enable Autofill to Fill out Web Forms in a Single Click.”
5) The next step is to deleted saved information. For this, go to Clear Browsing Data under the Privacy head and then click the checkbox next to “Autofill Form Data.”
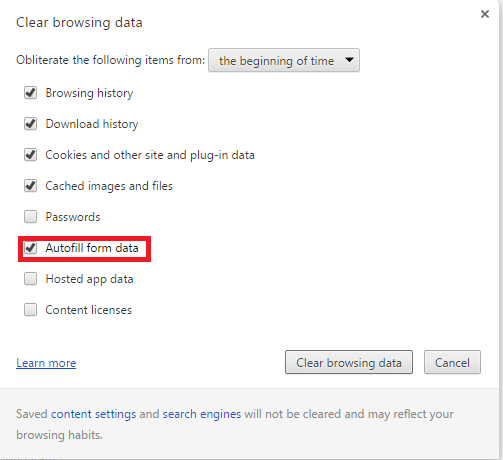
6) You can choose the amount of saved information you want to remove and then click on Clear Browsing Data.
Share your views with us in the comments section.