Plugins make our life easier to build a WordPress website faster and easier. Plugins extend the functionality of the default WordPress engine that does offer a lot of feature out of box. All layout and style related code should be in WordPress themes which is another topic in itself.
But when you need features that are not available readily, this is where WordPress custom plugins save our day. There are thousands of plugins in the WordPress Plugins store. If you are new to plugin development or are planning to work on a new WordPress plugin concept this post should help you quite a bit.
If you want to be a better WordPress developer please read our post on How to Become a Better WordPress Developer.
Few things to keep in mind while writing and publishing your plugin code.
Prefix Plugin Code
Make sure you prefix all the function inside the plugin code with a prefix based on the acronym of your plugin name. For example a function like function admin_settings_menu() will be re-factored as function cgs_admin_settings_menu() with the prefix cgs_ which is used for Content Grid Slider.
Plugin Screenshots
Prepare the screenshots of your plugin and name them like screenshot-1.png, screenshot-2.png and so on. You can also create a banner that will appear in your WordPress plugin page as banner-772×250.png
Create Readme File
Create a readme.txt file based on the readme file template that is available here https://wordpress.org/plugins/about/readme.txt
Submit Plugin to WordPress.org
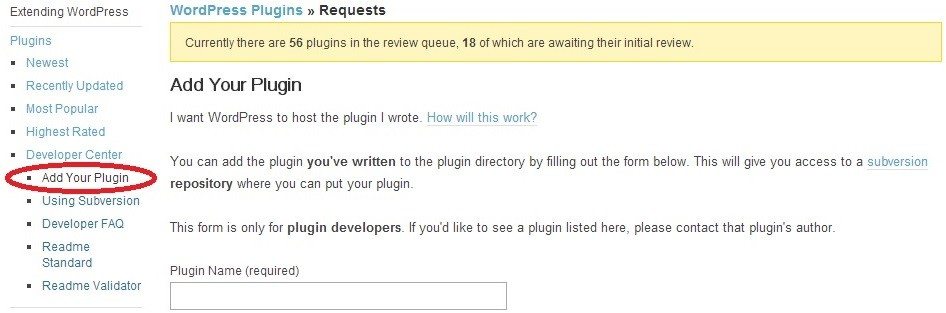
After you are done creating your plugin, please visit wordpress.org and create an account if you have not done that already. Once you have logged in to your wordpress.org account navigate to the Add Your Plugin and Name, Description and url of your plugin zip file so the WordPress team can evaluate and approve it.
Wait for Approval
Once the plugin details are submitted you will get a notice from WordPress.org team depending upon the number of plugins in the queue for review. Once the plugin is approved you will receive a notification with access to SVN repository with the same credentials you used for WordPress.org account.
Prepare to Publish Code to WordPress Repository
In order to publish your plugin code to the WordPress repository you will need a version control tool to check in, check out code. In this case we will use TortoiseSVN which is a neat version control software for windows platform. It is based on Apache™ Subversion (SVN)®; TortoiseSVN provides a nice and easy user interface for Subversion.
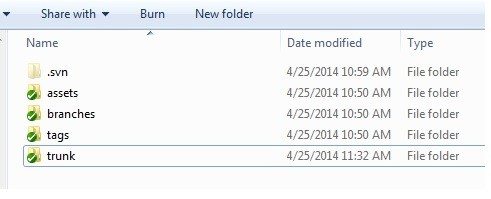
After the tool is installed, create a root folder for your plugin that will mirror the WordPress.org SVN repository folder structure. In this case we will use the name content-grid-slider
Add Plugin Code to Repository
Now, open command prompt and run this command to sync the folders from your remote WordPress SVN repository. If you want to read more about SVN with WordPress you can follow how to use subversion with WordPress
svn co http://plugins.svn.wordpress.org/content-grid-slider content-grid-slider
You should have your local folders created something like this
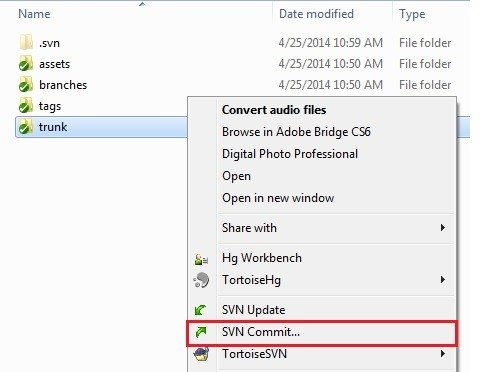
Now, open the trunk folder and place all your plugin code files here and select all files and add it to the source control, see the screenshot below.

Push Code to Repository
The last step is to push all the changes back to the remote wordpress repository, for this we use the SVN Commit option from the context menu.
If multiple developers are working on the plugin code they can use the SVN Update to get the latest changes before pushing their own changes. I hope this helps whoever is trying to publish their first WordPress plugin.
You can see a complete demo of the Content Grid Slider Plugin here
If you enjoyed this post, please consider sharing, leaving a comment or subscribing to the RSS feed to have future articles delivered to your feed reader.